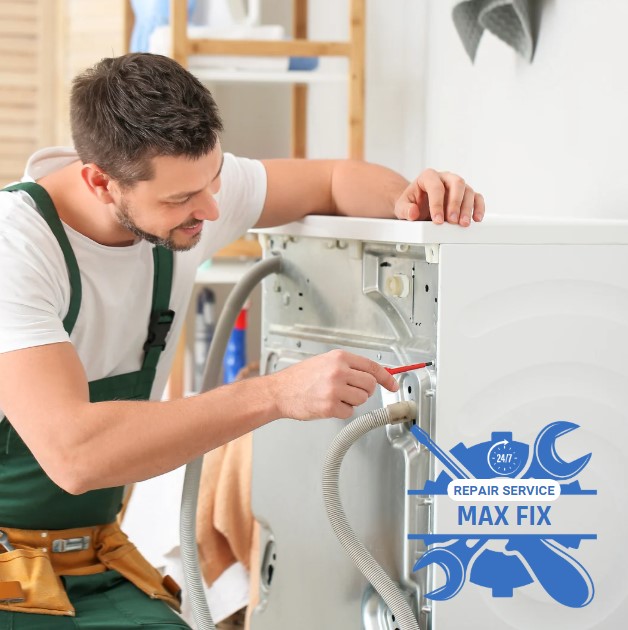
Why is my washer not draining water after the cycle?

Why is my washer not draining water after the cycle?

Have you ever experienced the frustration of a washer that won’t drain water after a cycle? It can be an annoying and time-consuming issue that disrupts your laundry routine. In this article, we’ll explore the common reasons why your washer may not be draining water after completing a cycle and provide troubleshooting steps to identify and resolve the issue.

Key Takeaways:

  • There are various reasons why your washer might not be draining water after a cycle.
  • Troubleshooting steps can help you identify the issue and find a solution.
  • Consult your washer’s user manual or a professional if you’re unsure or uncomfortable with performing repairs.
  • Don’t let drainage problems dampen your laundry routine; get your washer up and running efficiently again.

Clogged Drain Hose

If your washer is not draining water properly after completing the cycle, one possible cause could be a clogged drain hose. This issue can result in an unpleasant odor, and it can also lead to flooding in your laundry room. Here’s how you can identify and clear any blockages in your drain hose:

  1. Unplug your washer. Safety is important! Make sure your washer is unplugged before you start inspecting the drain hose.
  2. Locate the drain hose. The drain hose is usually located at the back of the washer. It’s a flexible, ribbed tube that connects the washer to the standpipe or a drain.
  3. Check for kinks or bends. Make sure the drain hose is not kinked or bent, as this can obstruct the flow of water.
  4. Inspect for any visible obstructions. Check the drain hose for any visible blockages, such as lint, paper, or small clothing items that may have gotten caught in the hose.
  5. Detach the hose from the washer and drain pipe. If you don’t see any visible blockages, you’ll need to detach the hose from the washer and drain pipe to inspect it further.
  6. Clear any blockages in the hose. Run a long, flexible brush or plumbing snake through the drain hose to clear any blockages. Be gentle when doing this to avoid damaging the hose.
  7. Reconnect the hose to the washer and drain pipe. Once you’ve cleared any blockages, reattach the hose to the washer and drain pipe, making sure it’s properly secured and not kinked or bent.
  8. Test your washer. Plug your washer back in and run a test cycle to make sure the water is draining properly.

If you’ve followed these steps and your washer is still not draining water correctly, it’s possible that the issue is not related to the drain hose. In this case, you may need to explore other possible causes, such as a faulty drain pump or pump impeller problem.

Pump Impeller Problem

If your washer is not draining water after the cycle, a possible cause is a malfunctioning pump impeller. The impeller is responsible for driving water out of the machine during the drain cycle, and if it is damaged or worn out, it can result in drainage issues. Here’s how to troubleshoot this problem:

  1. Unplug your washer from the power source and turn off the water supply.
  2. Locate the pump impeller. It is usually situated at the bottom of the washer, beneath the wash drum.
  3. Inspect the impeller for any visible signs of damage or wear, such as cracks, chips, or missing blades. If you notice any of these issues, the impeller needs to be replaced.
  4. Attempt to rotate the impeller manually. If it doesn’t turn freely or feels stiff, there’s a blockage or debris lodged in the impeller assembly.
  5. If the impeller is removable, take it out and clean it thoroughly. Use a soft-bristled brush to remove any debris or build-up that may be obstructing the impeller. Reinstall the impeller and reassemble the washer.

If the impeller is not removable or if you’re uncomfortable performing these steps on your own, contact a professional for assistance. Remember to always refer to your washer’s user manual or consult a technician before attempting any repairs.

If your washer is not draining water, a malfunctioning pump impeller is likely one of the culprits. The impeller’s condition can directly affect the efficiency of the drainage system. Keep your impeller in good working order by inspecting it regularly and keeping it free of obstructions.

Faulty Drain Pump: Troubleshooting Steps and Solutions

If your washer is not draining properly, a faulty drain pump could be the culprit. The drain pump is responsible for removing water from your washing machine during the drain cycle. If it is malfunctioning, it can prevent your washer from draining water efficiently. Below are troubleshooting steps and solutions for addressing drain pump issues and restoring proper water drainage in your washer.

Diagnosing the Problem

The first step in addressing a faulty drain pump is diagnosing the problem. If your washer is not draining properly, check the drain pump for any signs of malfunction or damage. A few key warning signs that your drain pump may be faulty include:

  • Unusual noises during the drain cycle
  • Water remaining in the washer after the cycle is complete
  • Failure to start the drain cycle

If you notice any of these issues, it is likely that your drain pump is malfunctioning and needs to be addressed.

Inspecting the Pump

Before attempting to repair or replace the drain pump, it’s important to inspect it thoroughly to identify the root cause of the problem. Follow these steps to inspect the drain pump:

  1. Unplug your washer from the power source and turn off the water supply.
  2. Locate the drain pump, which is typically located at the bottom of the washer.
  3. Check the pump for any visible signs of damage or malfunction, such as cracks, leaks, or broken components.
  4. If the pump appears to be in good condition, check for any blockages or debris that may be obstructing the flow of water.

If you identify any issues during the inspection, you may be able to repair or replace the affected components to restore proper pump function. If the pump is severely damaged or malfunctioning, it may need to be replaced entirely.

Replacing the Drain Pump

If your inspection reveals that your drain pump needs to be replaced, follow these steps to replace it:

  1. Unplug your washer and turn off the water supply.
  2. Remove any hoses or connections from the drain pump.
  3. Remove the screws or fasteners securing the pump in place.
  4. Remove the old pump and install the new pump in its place.
  5. Reattach any hoses or connections to the new pump.
  6. Secure the new pump in place with screws or fasteners.

After replacing the drain pump, test your washer to ensure that it is draining water properly. If you continue to experience issues with water drainage, consult your washer’s user manual or a professional for further assistance.

Clogged Filter or Lint Trap

If your washer is not draining water properly, one possible cause could be a clogged filter or lint trap. Over time, these components can accumulate dirt, debris, and lint, which can impede the flow of water during the drain cycle.

To address this issue, it’s essential to locate and clean these components regularly. Consult your washer’s user manual to identify where the filter and lint trap are located. In most cases, the filter is situated at the bottom front of the washer, while the lint trap is located inside the drum.

Tip: Before cleaning the filter and lint trap, make sure to unplug your washer from the electrical outlet and turn off the water supply.

Once you’ve located the filter and lint trap, remove them and rinse them thoroughly under running water. Use a soft-bristle brush to scrub away any visible dirt or debris. Be sure to clean the entire surface of the components, including the crevices and corners.

Pro Tip: Check if the clog is in the drain hose by pouring water directly into it. If the water flows smoothly, then the problem is in the filter or lint trap. If not, the drain hose is the culprit.

After cleaning, reattach the filter and lint trap, making sure they are secured tightly. Run a test cycle to check if the drainage problem has been resolved.

Table: Comparison of Clean Filter vs. Dirty Filter

Attributes Clean Filter Dirty Filter
Water Flow Efficient and smooth Slow and turbulent
Appearance Clear and free of debris Cloudy and full of lint and debris
Drainage Problem Unlikely to cause issues Could be the cause of the drainage problem

clean filter

Tip: To prevent future drainage problems, make it a habit to clean the filter and lint trap at least once a month. This will help ensure optimal performance and prolong the lifespan of your washer.

Overflowing Standpipe: Troubleshooting Washer Drainage Issues

If you’ve noticed water backing up into your washer after a cycle, you may have an overflowing standpipe. This issue can lead to a messy and inconvenient situation, and it’s essential to take steps to address it promptly.

The standpipe is the vertical pipe that connects your washer to the drain system, located behind or beside your machine. Its height should be at least 18 inches above the trap arm and 30 inches above the floor. If it’s lower than this, water can easily overflow.

One common cause of an overflowing standpipe is a clog in the drain pipe. This blockage can lead to water backing up into your washer, rather than flowing through the drain system.

How to Fix an Overflowing Standpipe

  1. First, turn off your washer and unplug it from the wall to prevent any electrical hazards.
  2. Next, locate the standpipe and check its height. Make sure it’s at least 18 inches above the trap arm and 30 inches above the floor to prevent water from overflowing.
  3. If the standpipe’s height is correct, the next step is to check for any blockages in the drain pipe. You can do this by removing the drain hose from the standpipe and inspecting the pipe for any debris or buildup.
  4. If you spot any blockages, you can try flushing the pipe with hot water or using a plumbing snake to clear the obstruction.
  5. After clearing any blockages, reconnect the drain hose to the standpipe and run a cycle to test if the issue has been resolved.

If the problem persists, you may need to call a professional plumber to inspect and repair your drain system.

Signs of an Overflowing Standpipe Possible Causes
Water backing up into the washer Low standpipe height, drain pipe blockage
Slow water drainage Blockage in the drain pipe
Gurgling noises Blockage in the drain pipe, faulty venting

Remember, an overflowing standpipe is a common issue that can be resolved with some troubleshooting. By following the steps outlined in this section, you can identify and address the problem and restore proper water drainage to your washer.

Clogged Pump Belt or Motor: Why Your Washer is Not Draining Water after the Cycle

If your washer is not draining water after the cycle, it could be due to a malfunctioning pump belt or motor. The pump belt is responsible for powering the pump that removes water from your washer, and the motor drives the belt. If either of these components is faulty, it can result in a drainage issue.

Here are some troubleshooting steps to help you identify and resolve the problem:

  1. Unplug your washer from the electrical outlet and turn off the water supply.
  2. Locate the pump belt and inspect it for signs of wear and tear or damage. A damaged belt will need to be replaced.
  3. Check the motor for any visible signs of damage, such as burnt-out wires or a damaged pulley. If you see any signs of damage, the motor will need to be replaced.
  4. Test the pump belt tension by pressing on it with your finger. If it feels loose, it may need to be adjusted or replaced.
  5. Check the motor drive coupler, which connects the motor to the pump. If it is damaged or broken, it will need to be replaced.

Once you have identified the cause of the drainage issue, you can take the necessary steps to fix it. If you are uncomfortable with performing repairs, it’s always best to consult a professional.

washer pump belt

“A malfunctioning pump belt or motor can hinder the drainage process in your washer.”

By following these troubleshooting steps, you can ensure that your washer is running efficiently and effectively. Don’t let a drainage issue disrupt your laundry routine. Address the problem promptly to get back to clean clothes and linens.

Cause of Washer Not Draining: Electronic Control Board Failure

If all other issues have been ruled out and your washer is still not draining water after a cycle, it’s possible that the electronic control board is malfunctioning. This component controls the timing and sequence of various washer functions, including the draining process.

Electronic control board failure can occur due to a power surge or other electrical issues. Symptoms may include the washer not starting, not advancing to the next cycle, or not draining water. If you suspect a control board issue, it’s recommended to consult a washer professional for repair or replacement.

“Electronic control board failure can occur due to a power surge or other electrical issues.”

Replacing an electronic control board can be costly, so it’s important to ensure that this is the root cause of your washer’s drainage issue before proceeding with repairs. A trained technician can diagnose and confirm if the control board needs replacement, as well as guidance on other potential issues that may be affecting your washer’s performance.

Remember, safety should always come first when dealing with electrical components. If you’re unsure of how to proceed with any repairs or replacements, it’s best to seek the assistance of a licensed professional.

Conclusion

In conclusion, a washer not draining water after the cycle can be a frustrating problem, but it can be resolved. By following the troubleshooting steps outlined in this article, you can identify the cause of the drainage issue and take the necessary steps to fix it.

Remember to always refer to your washer’s user manual or consult a professional if you’re unsure or uncomfortable with performing repairs.

Regular maintenance, such as cleaning the filter and lint trap, can also prevent drainage problems from occurring in the first place.

Don’t let a washer drainage issue disrupt your laundry routine. With a little bit of know-how, you can get your washer up and running efficiently again.

Max Appliance Repair

Written by Max | An appliance repair technician with more than 15 years experience in appliance repair services in Toronto and the GTA.


Disclaimer: This post "Why is my washer not draining water after the cycle?" is for information purposes only. If you need specific help, please contact Max Appliance Repair at https://maxfix.ca/contact/.